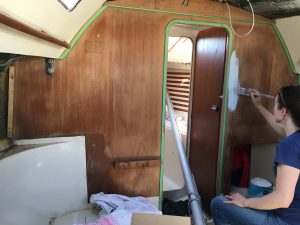
Not only do we often tackle bigger projects than we probably should, we also have a habit of adding to a project as it progresses. While we had the panels off for the electrical re-wiring, Lindsay decided that “we might as well” take the opportunity to paint the walls and refinish the trim.
The State of the Cabin
While CS sailboats are mostly free of exterior teak, the interior is typical of the era. That means large panels of teak veneer plywood, which makes for a dark cabin. The interior panels had been finished in teak oil, which builds up and gets sticky. We decided to paint the large panels to brighten up the cabin. We like the look of the teak trim, but it also needed to be refinished. When we purchased the teak cockpit table, I’d settled on Semco Teak Sealer after extensive research. We were quite happy with how it turned out, and very happy with the ease of application, so we decided to use it on the interior trim as well.

Cabin and V-Berth Bulkheads
The first thing to do was get rid of the old teak oil. Two applications of Semco Teak Cleaner brought the wood to approximately it’s original state. We then used Bondo Wood Filler on a few holes. We decided on 2 coats of primer, since teak is a very oily wood, and we didn’t want to repeat this process anytime soon. Once Lindsay painted the panels (2 coats) we were amazed at how much brighter the cabin looks.

The Job Gets Bigger
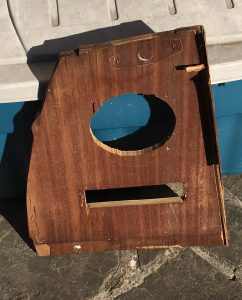
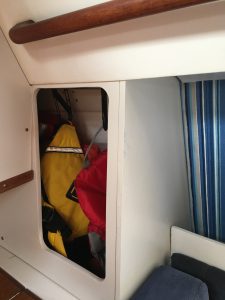
A previous owner had installed a stereo, and mounted it in side of the wet locker. It made the wet locker virtually inaccessible, and our family of 5 needed all the available space when cruising. Also, these days it is just as easy to just use our phones and a Bluetooth speaker (Lindsay was given this one as a Christmas present). We took out the stereo and speaker from the side of the wet locker, and then had 2 large holes to deal with. One of the stanchions nearby had been leaking the previous year, and the water ended up at the bottom of this panel and it was delaminating. Les didn’t want to increase the scope of the project, but knew that the panel should be replaced. The panel holding the stereo was glued the one beside it, so both came out. He also removed the panel that formed the back of the settee, and the one behind it that lined the hull. Both were casualties of the aforementioned leak.

Installing the New Panels
After some research, Les purchased a 4×8′ sheet of 1/2″ baltic birch plywood from Exotic Woods in Burlington. This specific plywood was not technically marine-grade, but used the same glue. Les decided it would work since we were going to fully seal it with primer and paint. He also got a 1/8″ sheet of teak marine plywood for behind the settee. We used the old panels as a pattern, with some minor modifications. The opening to the wet locker changed to match the hole-saw we had, and because Lindsay liked a smaller radius on the corners. Les didn’t want to bother with the compound angle joining the 2 panels, and decided that a butt joint with a piece of trim would look quite nice. And one day Les will actually install it.

We Discovered More Space!
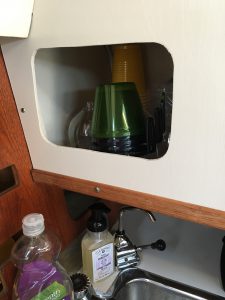
When Les removed the second speaker from the companionway panel above the sink, he discovered a large cavity. Expanding the opening, and painting the interior of the cavity dealt nicely with the hole in the panel. It was easier than trying to fill it or replace the entire panel, and gave us more storage space. The bottom of the the nook isn’t very strong, only 1/8″ plywood, but works great for light, plastic dishes.


Comments: no replies